
++ SPECIAL ONGUSHI WITH CGPLUS MAGAZINE ++
พบกับ ONGUSHI ในนิตยสาร CGplus Magazine
14 DEC 08
ทุกแผงหนังสือชั้นนำทั่วประเทศ
พบกับ ONGUSHI ในนิตยสาร CGplus Magazine
14 DEC 08
ทุกแผงหนังสือชั้นนำทั่วประเทศ
+
+
+
+
+
-----------------------------------------------------------------------------------------------------------------------------------------------------------
มาลองทำเชือกกันเถอะ
MAKE TO TOW +01
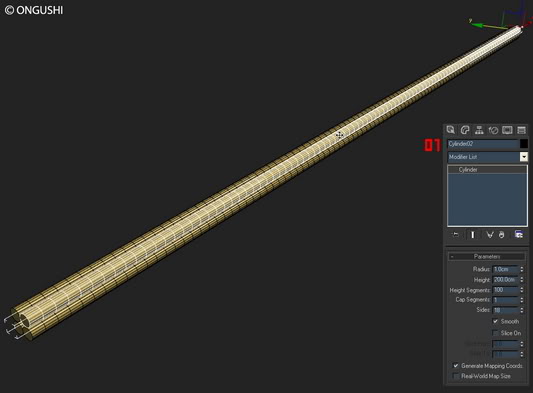
1.สร้าง Cylinder ขึ้นมา 4 ท่อน ความยาวตามเชือกที่เราต้องการ
1.begin with 4 Cylinder . Just make sure it has lots of
height segments.

2.จับ Cylinder ทั้ง 4 ท่อน convert to poly
2.Convert one of the cylinders to editable poly.
3.ใช้คำสั่ง Attach Cylinder ทั้ง 4 ท่อนเข้าด้วยกัน
3.Attach all the cylinders to it.
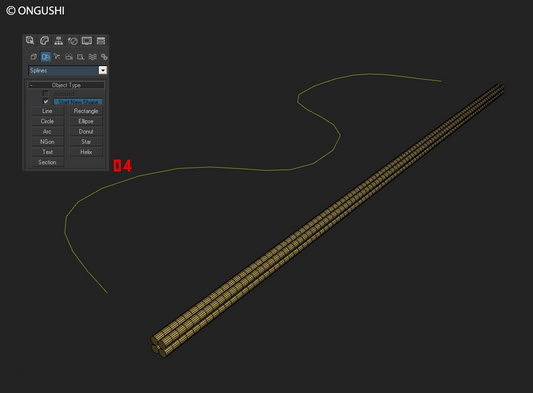
4.สร้าง Line ขึ้นมา 1 เส้น เพื่อเป็นเส้นไกด์
4.Create the shape of your wire
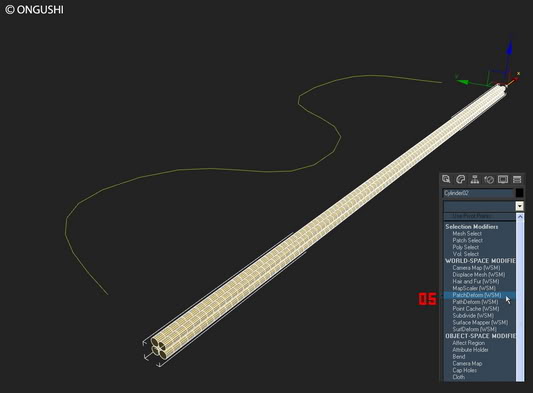
5.เลือก Cylinder เข้าคำสั่ง Path Deform Binding (WSM) ใน Modifier List
5.Add path deform (WSM) to your cylinders.

6.กด Pick Path เพื่อเลือกเส้นไกด์ จากนั้นกด Move to Path เพื่อให้เชือกไหลไปตามเส้นไกด์
เมื่อได้เชือกตามทิศทางที่ต้องการแล้วจังปรับค่า Percent, Stretch, Twist ตามความเหมาะสม
6.Pick the line you created and select move to path.
On Percent, Stretch, Twist value enter lots of height.
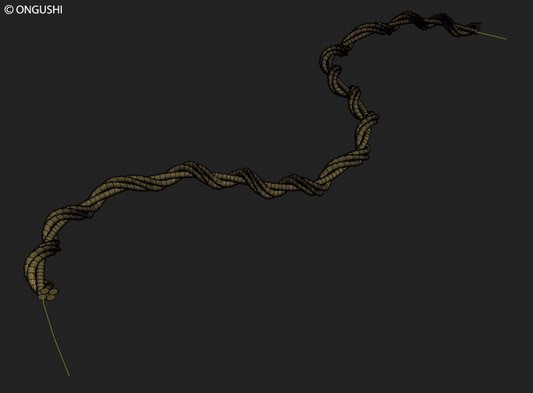
สำเร็จไป 1 วิธี
Finish
MAKE TO TOW +02
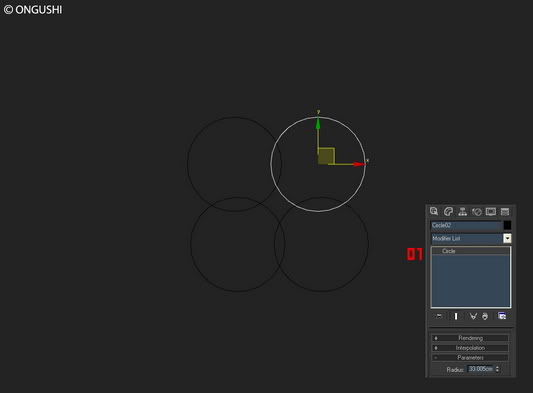
1.สร้างเส้น Circle จำนวน 4 วง
1.create 4 Circles
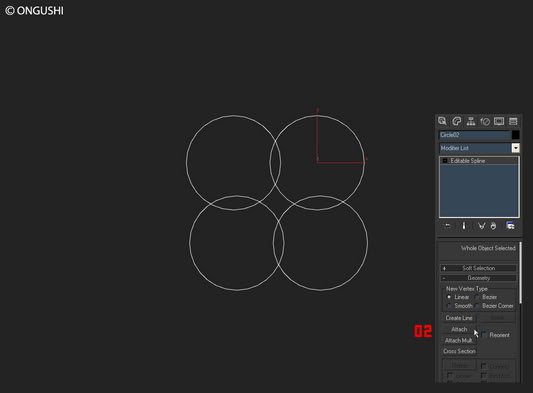
2.Convert Circle to Editable Spline แล้ว Attach วางกลมทั้งหมดเข้าด้วยกัน
2.Convert Circle to Editable Spline and after this attach it to one object.

3.จัดการ Boolean เส้นทั้งหมดให้เป็นหนึ่งเดียว
3.At the end using "boolean" get proper shape.
4.สร้าง Line มา 1 เส้น เพื่อเป็นเส้นไกด์
4.Create the shape
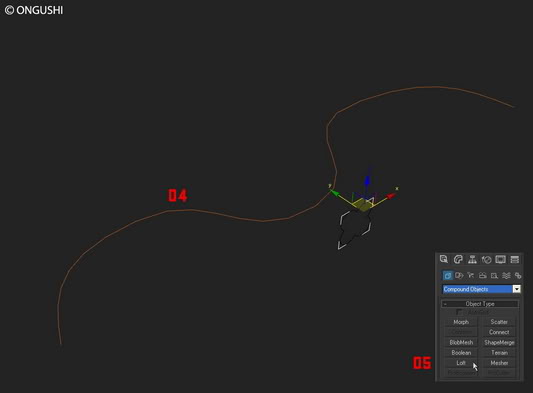
5.เข้าคำสั่ง Loft ใน Compound Objects
5.Add 'loft' modify from Compound Objects
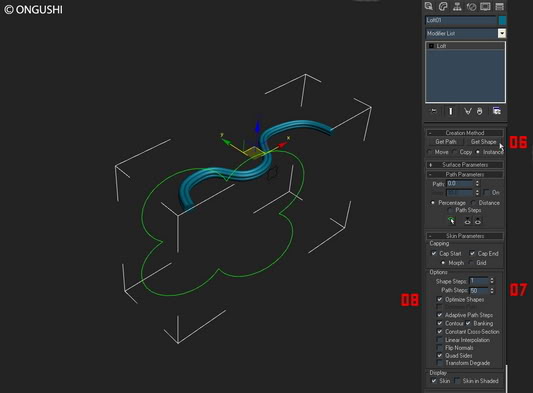
6. กด Get shape เพื่อเลือกเส้นไกด์
7. ใส่ค่า Path Shapes ยิ่งเยอะยิ่งเนียน ยิ่งเนียนยิ่งหนัก
8. ติ๊กถูกที่หน้า Optimize Shapes
- And all options set like at image above -
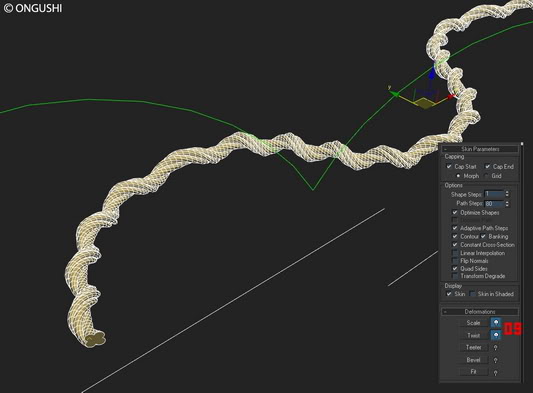
9. ปรับค่า Scale และ Twist เพื่อความเหมาะสมของโมเดล
9. Options scale, twist set ... up to you.

สำเร็จแล้วหรอเนี่ย . . . ไม่ยากเนอะครับพี่น้อง
Finish
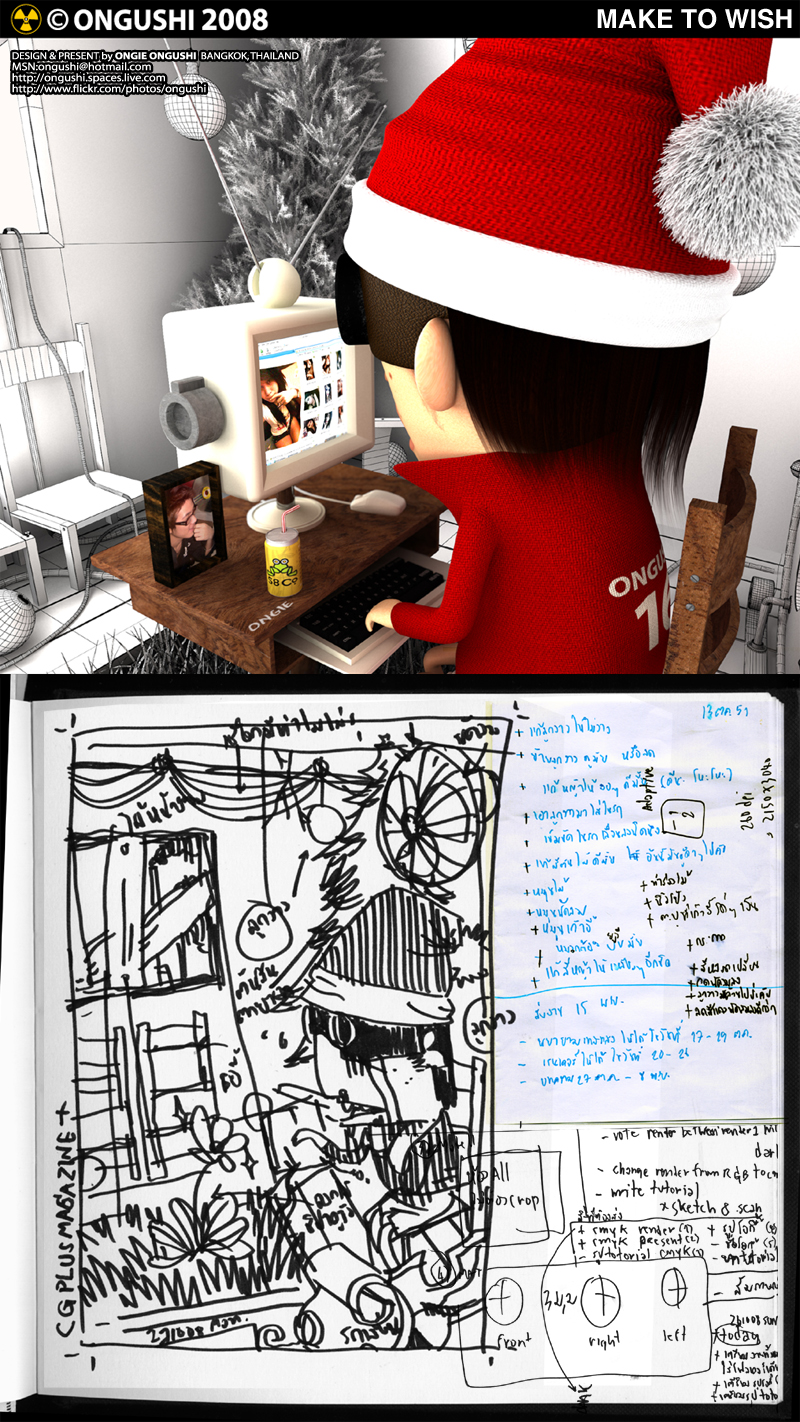
© ONGUSHI (PIYAVACH ARUNOTAI)
special tip: จากพี่ pomeang บอร์ด Thaiviz
"หลังจาก Attach แล้ว ถ้าจะให้เชือกเป็นเกลียวเท่าๆกัน
ก็ย้าย pivot ไว้กลางก่อนก็ดีนะครับ"
